Berrylicious
I made this lovely sponge cake for Mothers Day. A recipe from A Baking Day with Anna Olson, found on page 231.
It’s a showstopper and definitely feeds a crowd.

Ingredients


The Ribbon Stage
Tips For the Perfect Sponge
- Ensue your dry ingredients are sifted well
- beat eggs and sugar to ribbon stage (take a look at photos and below tips)
How to tell if ribbon stage has been reached
Usually it takes anywhere from 3 to 5 minutes of beating eggs and sugar using an electric mixer to reach ribbon stage. But don't rely on time. Instead, use some key visual clues to recognize when you’ve succeeded:
- Texture: The mixture should have thickened significantly, becoming almost foam-like. This is where the “ribbon” part comes in: when you lift the mixer attachment or whisk from the mixture, the batter should fall back in thick trails. The ribbon lines will stay suspended on top of the batter, remaining clearly visible on the surface for a few moments before slowly disappearing.
- Color: The mixture should also have become considerably lighter and be a very pale yellow.
- Volume: The eggs and sugar will have noticeably expanded, increasing the volume of the batter (often triple the original size). This is because of all the (super-important) air that’s been added to the mixture from beating.
Critical
- The key to making a perfect sponge cake is achieve full volume when beating the eggs and then trying to deflate them as little as possible when you add in the dry ingredients.
- Very slowly and carefully FOLD dry ingredients by hand with a bowl scraper (see photo- cake boss are my favourite) I add in 2 increments

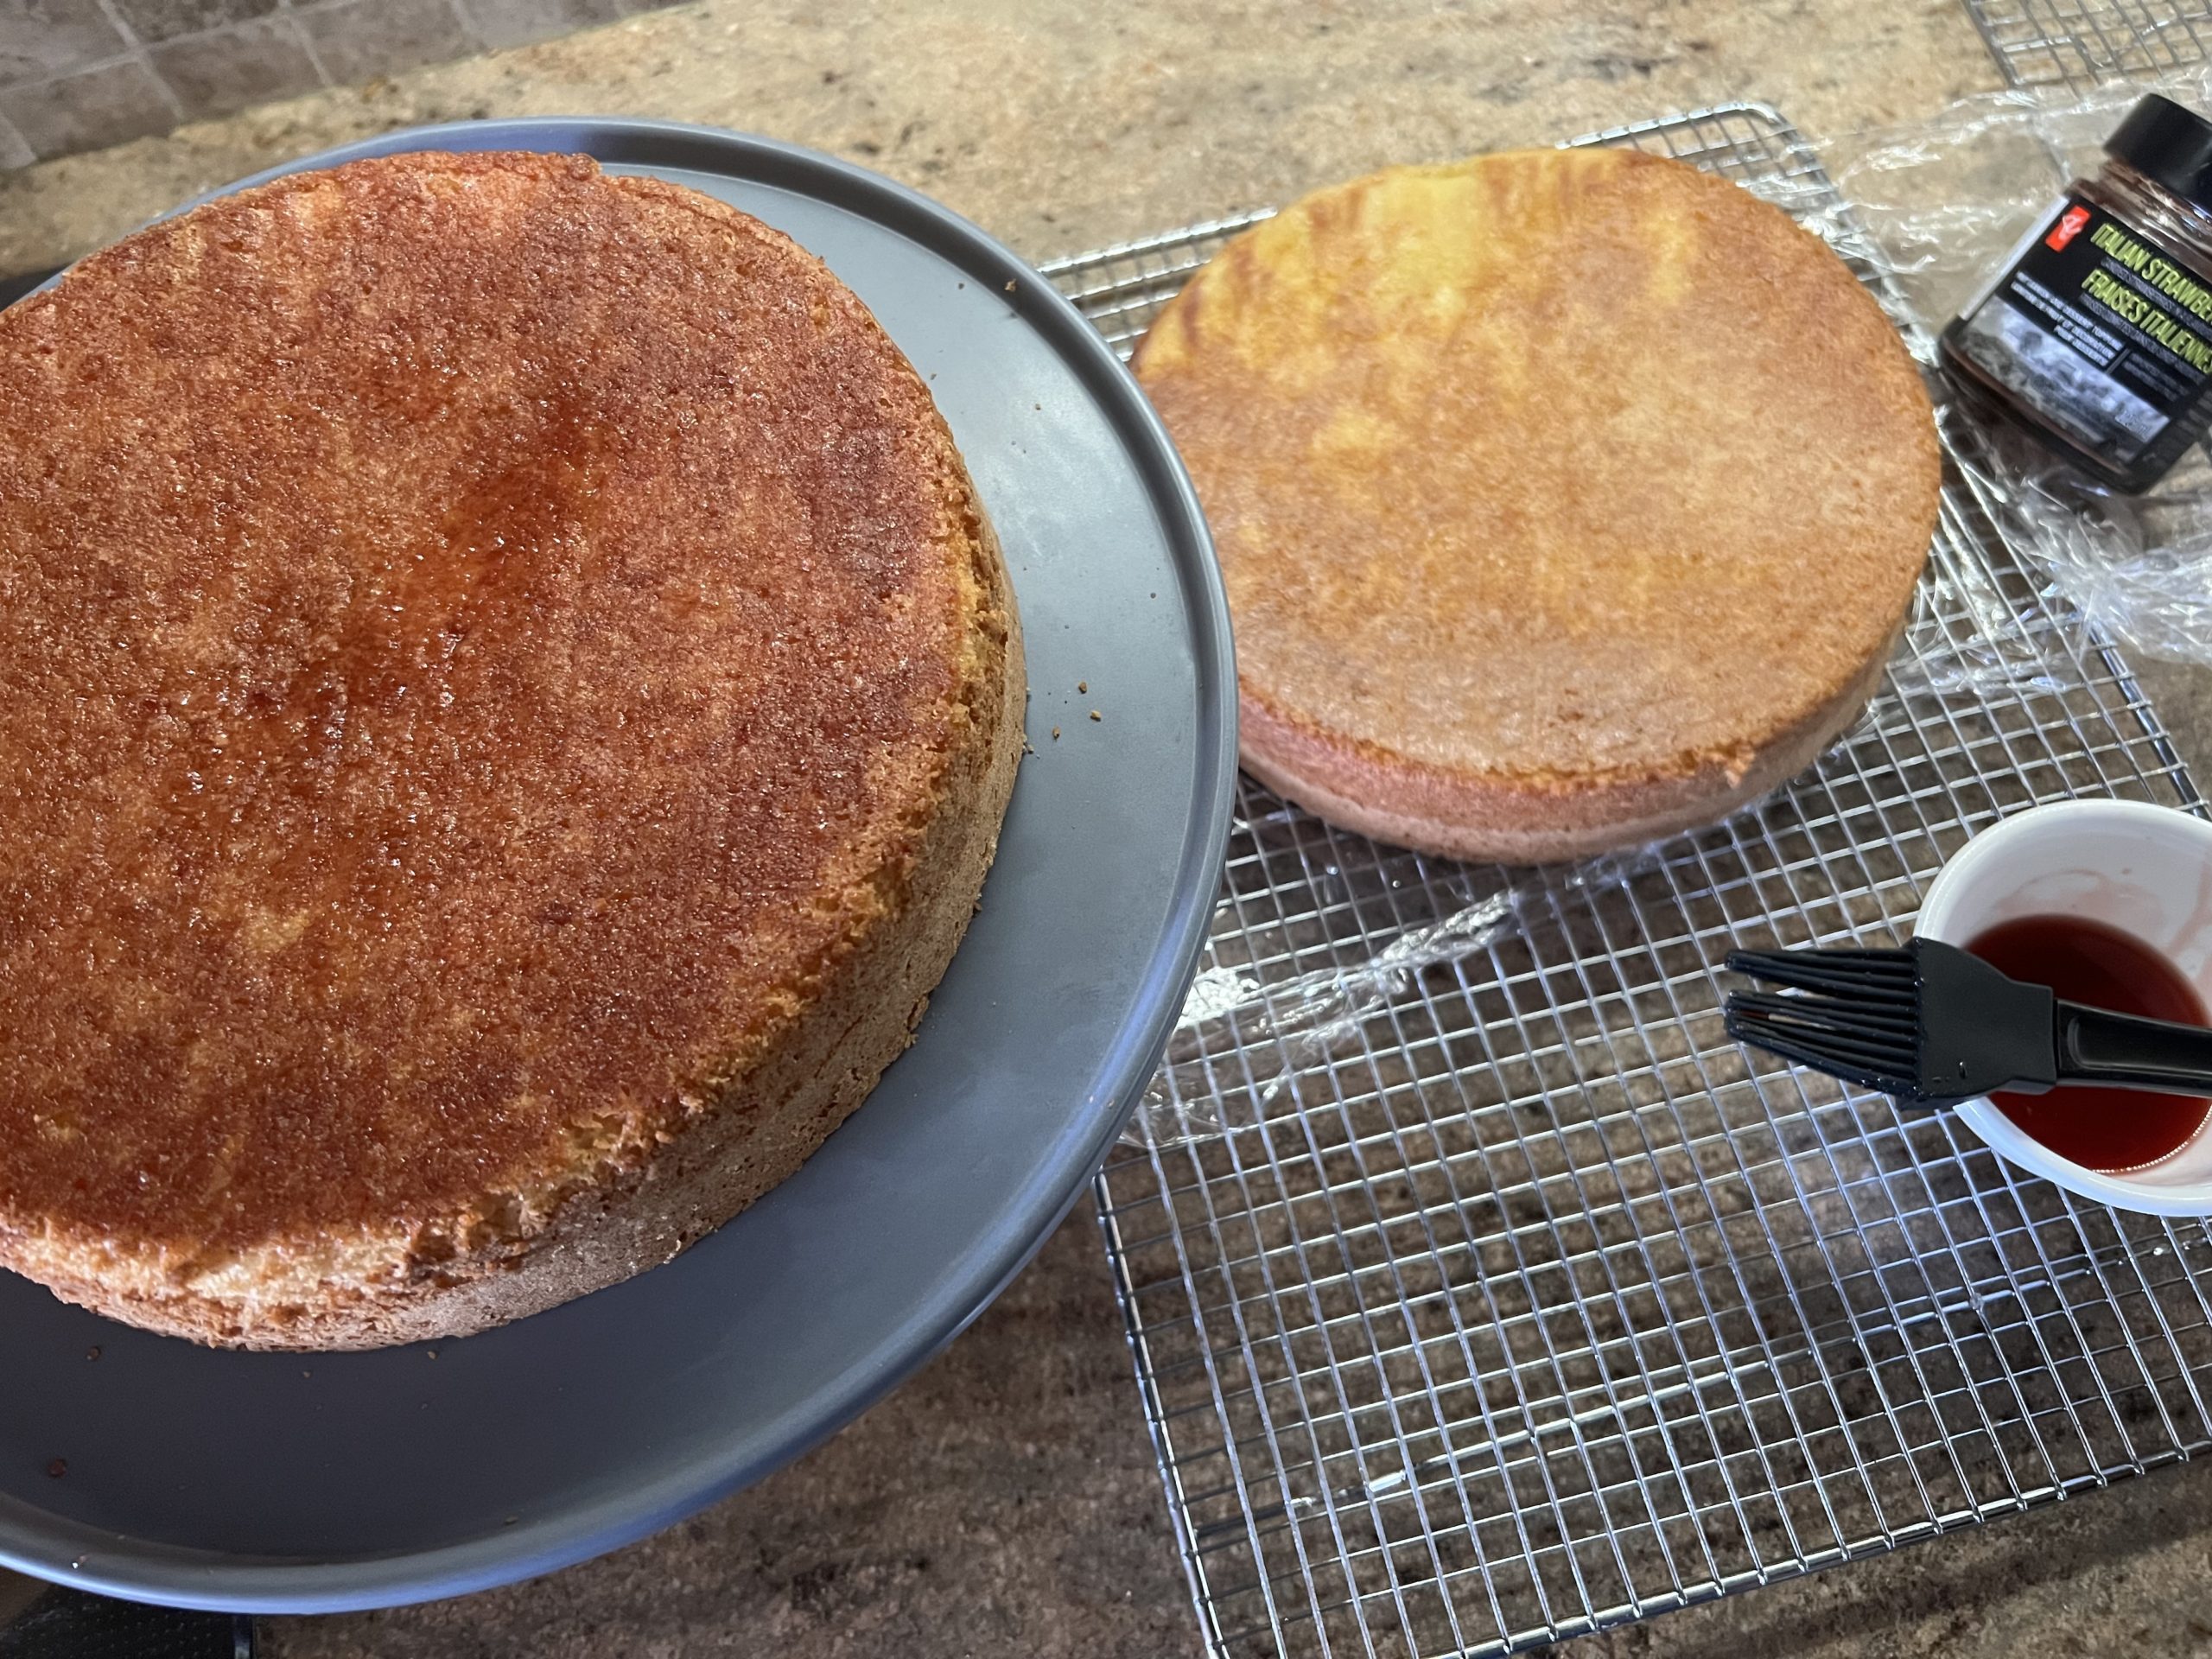
Simple Syrup - and why you need to use
Bakers gently brush simple syrup over each layer, allowing the liquid to soak into the sponge. This adds the perfect amount of extra moisture to the cake and gives a touch of added sweetness. It’s also a helpful remedy if you overbaked your cake, because the simple syrup puts moisture back in.
Instead of making a simple syrup I used the syrup from a jar of candied strawberries. I gently brushed on each cake layer.
**NOTE**
see end of post for simple syrup recipe
The Results
My rating of this recipe is 4 out of 5. The cake is definitely a showstopper as long as you don’t try to serve it. I omitted the pile of berries on top, for a simpler decoration and served berries on the side. Even adjusting topping, it was difficult to cut and was not very appealing on plate. This dessert was very tasty but I won’t be making again.
This is a community cookbook club where we want to see your photos of your end result. Don't forget to tag your photos on instagram with @smidgencookbookclub or post your photo on our facebook Bake Along with Smidgen

-
Want to make a flavored version of simple syrup? Try one of these variations, which each makes about 1/2 cup (113g) of syrup:
- Vanilla simple syrup: Combine 1/3 cup (67g) sugar, 5 tablespoons water, and a pinch of salt. Heat briefly, just to dissolve the sugar, then stir in 2 teaspoons vanilla extract.
- Lemon simple syrup: Mix the juice of 1 lemon (about 50g) with 1/2 cup (99g) sugar, and heat until the sugar dissolves.
- Rum simple syrup: In a medium-sized saucepan, combine 4 tablespoons (57g) unsalted butter, 2 tablespoons (26g) water, 1/2 cup (99g) sugar, 1/8 teaspoon salt and 1/4 cup (57g) rum. Bring to a rapid boil, reduce to simmer, and cook (without stirring) for about 5 minutes, until the syrup thickens slightly. Remove from the heat and add 1/4 teaspoon of vanilla extract.
- Coffee simple syrup: Mix together 2 tablespoons (28g) coffee liqueur, 1 1/2 tablespoons espresso powder, 2 tablespoons (23g) sugar, and 1/2 cup (113g) hot water.
LOOK FOR THE BIG RED BARN
4675 Line 3
St. Marys, On
HOURS
Call in advance
647 393 3821